Section 14 - Tabulator Trusted Build Instructions
Environment variables
Other than where specifically indicated below, building the application and generating hashes does not require that the system have any environment variables defined in advance.
Full build
RCTab can be built on any COTS x64 Windows machine with
- Windows 10 or greater
- At least 1GB of free space
- 4GB of RAM
To generate a build from the source code and then generate a hash of that build, use the following steps.
There are 4 setup steps that must be followed before you can build RCTab. Those steps are
- Get the source code
- Prepare Java
- Prepare Gradle
- Get third party dependencies
Source Code
First, you need a local copy of the source code. You can either get it from the RCTab Release page or directly from Git.
RCTab Release Page
Navigate to the RCTab Release page. Find your version. For v1.3.2 in California it is v1.3.2 (84df706). Download and extract the Source code (zip).
Git
Important note for Windows users: to ensure that the files in your copy of the repository exactly match the ones that were originally used to generate the Windows release build, you must have Git’s autocrlf setting enabled before you clone the repository. This setting will cause Git to automatically convert the line endings in each source file from Unix-style (\n) to DOS-style (\r\n) when it clones the repository to your machine.
- If Git is not already present on the machine, install it. The Windows version of Git is available here: https://github.com/git-for-windows/git/releases/tag/v2.42.0.windows.2
X64git installer isGit-2.42.0.2-64-bit.exewith aSHA256ofbd9b41641a258fd16d99beecec66132160331d685dfb4c714cea2bcc78d63bdb- Run through the installer with all default settings
- Open Command Prompt
- Enable the autocrlf setting by running this command in the command prompt:
git config --global core.autocrlf true - Clone the repository with this command:
git clone --branch https://github.com/BrightSpots/rcv.git
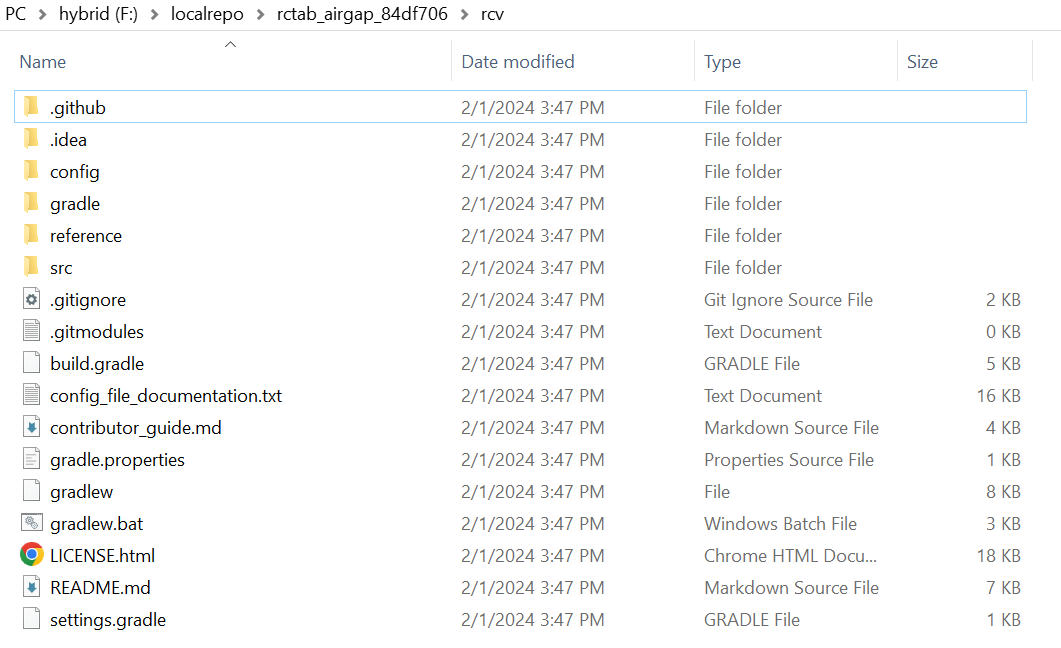
For the rest of this example we’ll refer to the folder that your source code is in as .\ In the example below, that corresponds to f:\localrepo\rctab_airgap_84df706\rcv\
Java
Java JDK
Building the application will also require the proper version of the Java development kit to be located on the machine.
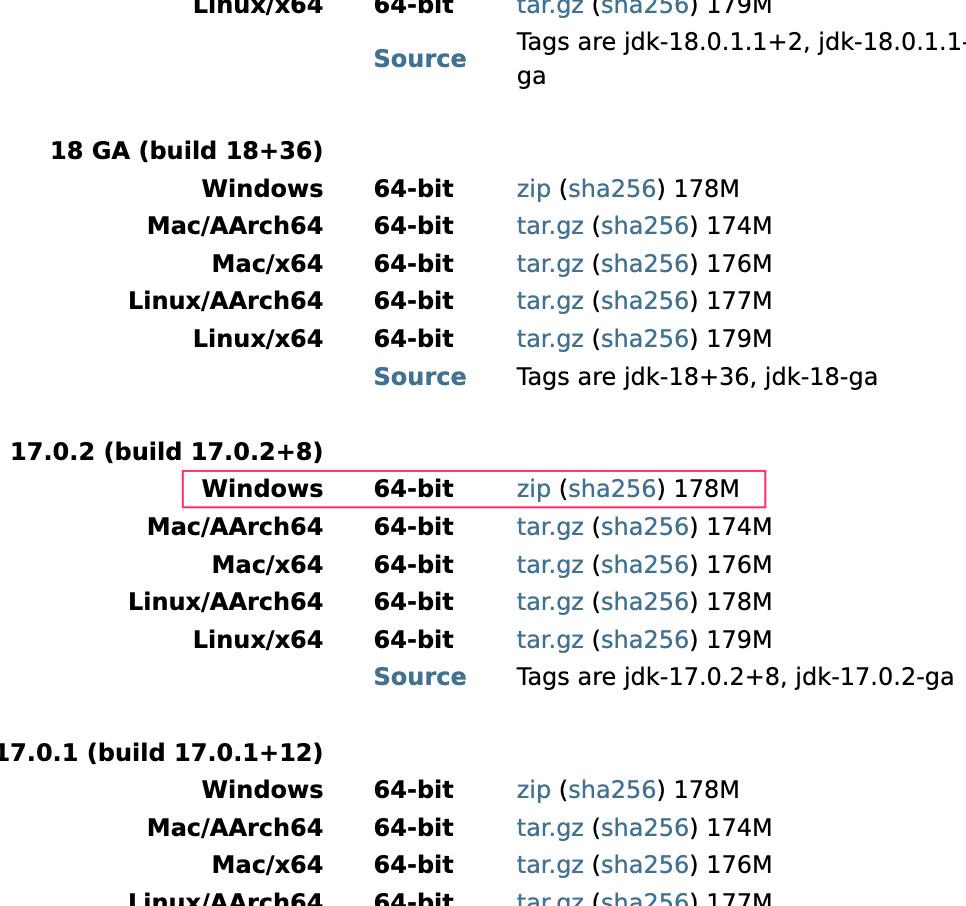
- Navigate to https://jdk.java.net/archive/.
- Download the .zip for the Windows x64 version of OpenJDK 17.0.2 (build 17.0.2+8).
- The SHA256 for the build 17.0.2+8 Windows x64 zip is
b2208206bda47f2e0c971a39e057a5ec32c40b503d71e486790cb728d926b615 - The .zip file when downloaded is named
openjdf-17.0.2_windows-x64_bin.zip
- The SHA256 for the build 17.0.2+8 Windows x64 zip is
- Extract the
openjdk-17.0.2_windows-x64_bin.zip. When unzipped, the folder it creates will be namedjdk-17.0.2. Note the location of this folder for the next step
Note that you must use this exact version of the JDK. If you obtain the JDK from a different location, even if the version and build numbers are the same, it may have subtle differences that will prevent your build from matching ours via the process we’ve developed. Specifically, we’ve determined that the Oracle-licensed build of OpenJDK is not identical to the London Jamocha Community CIC-licensed build.
Set JAVA_HOME variable
Use the following instructions to set your JAVA_HOME variable, a requirement for building the source code
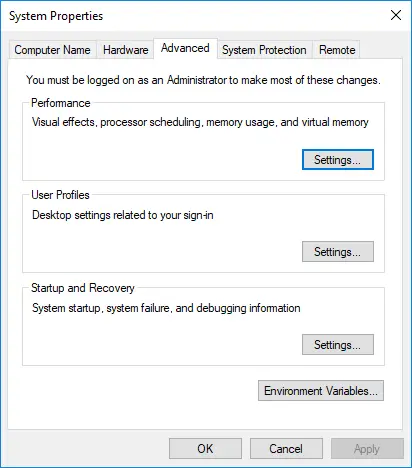
- Go to Start Menu and search for “Advanced System Settings”
- Click ‘View Advanced System Settings’
-
Go to the Advanced Tab and click ‘Environment Variables’ button
-
In the Environment Variables window that pops up, in the bottom System variables section click ‘New’ and add
JAVA_HOMEas the Variable name and click ‘Browse Directory’ to browse to your unzipped java folderjdk-17.0.2and set it’s path as the Variable value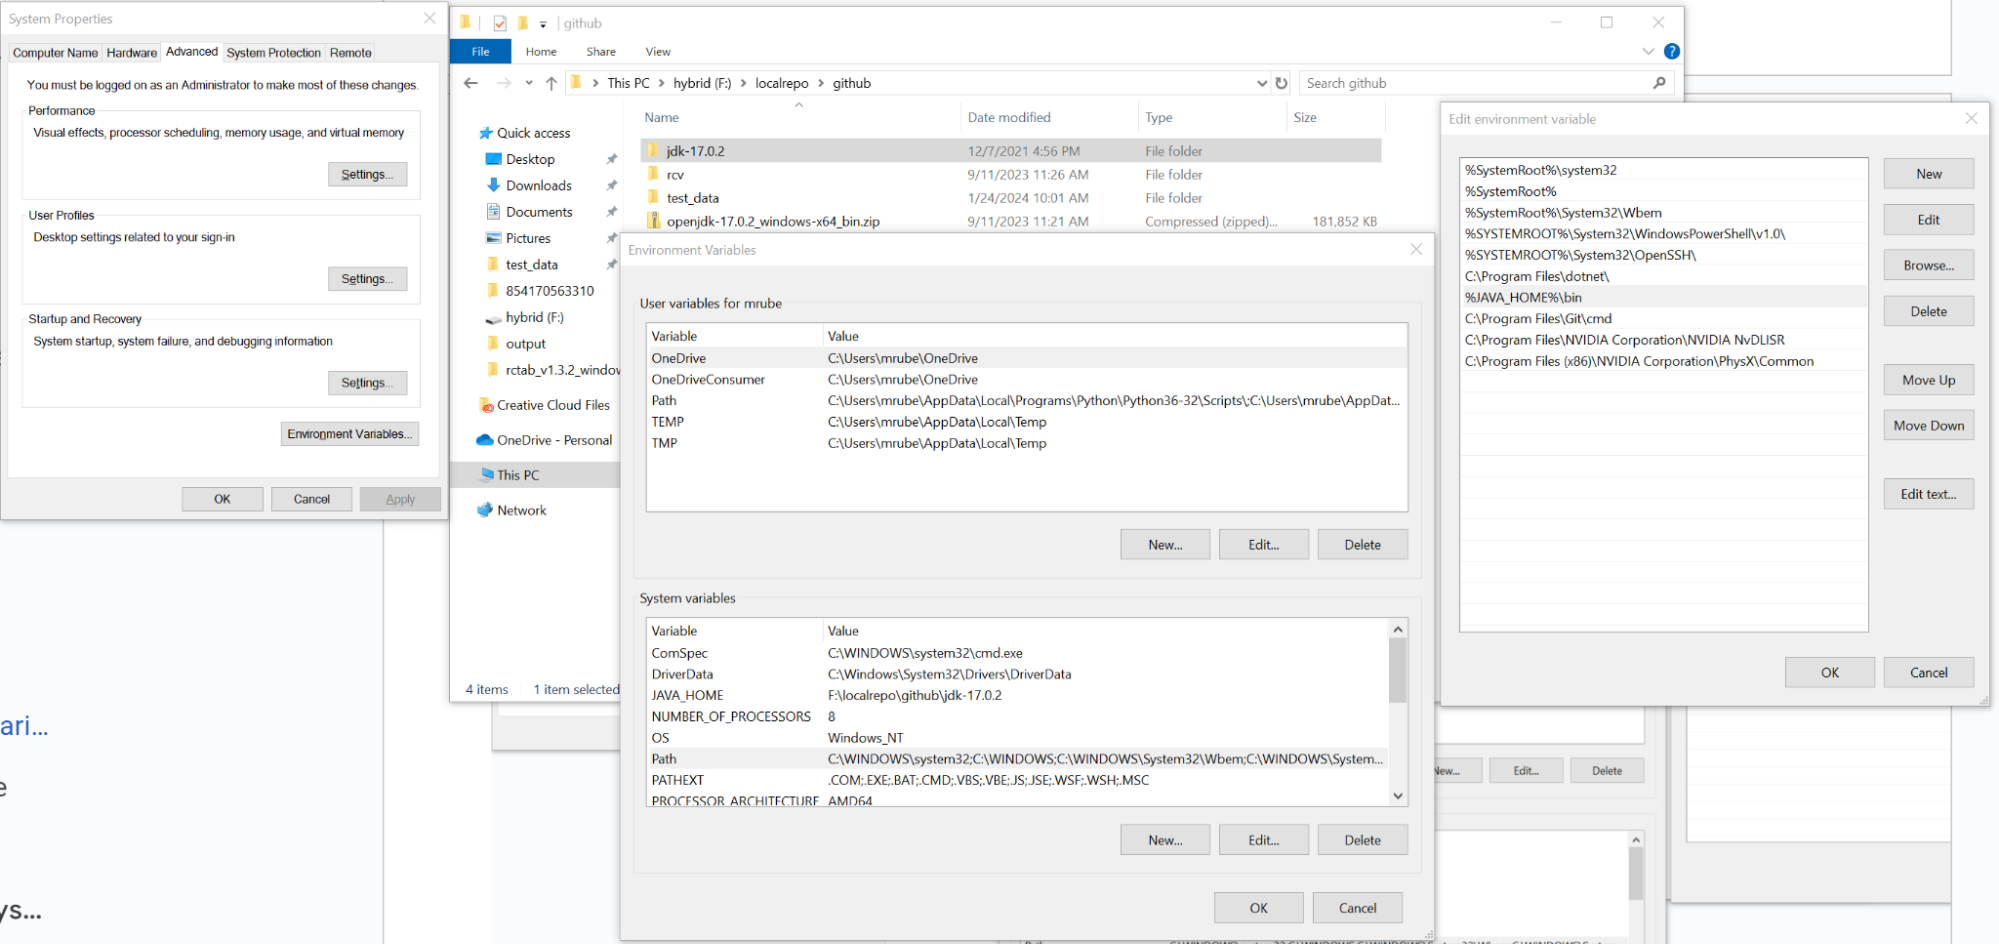
-
Go back to the Environment Variables window, find the
Pathentry in the bottom System Variables section and click edit - Click ‘New’ and add
%JAVA_HOME%\bin - Click ‘Ok’
- Click ‘Ok’ in Environment Variables window
- Click ‘Ok’ in System Properties window
- Close any Command Prompt Windows you have open
- Re-open Command Prompt and confirm that Java 17.0.2 is properly installed by running this command in the cmd prompt
java –versionyou should see an entry foropenjdk 17.0.2 2022-01-18
Gradle
- Download Gradle 7.5.1 from the Gradle release page
- Download the ‘binary-only’ option. This should download
gradle-7.5.1-bin.zipwith a hash off6b8596b10cce501591e92f229816aa4046424f3b24d771751b06779d58c8ec4 -
Extract the zip. Add the
binfolder of the extracted zip to your System Path like you did for Java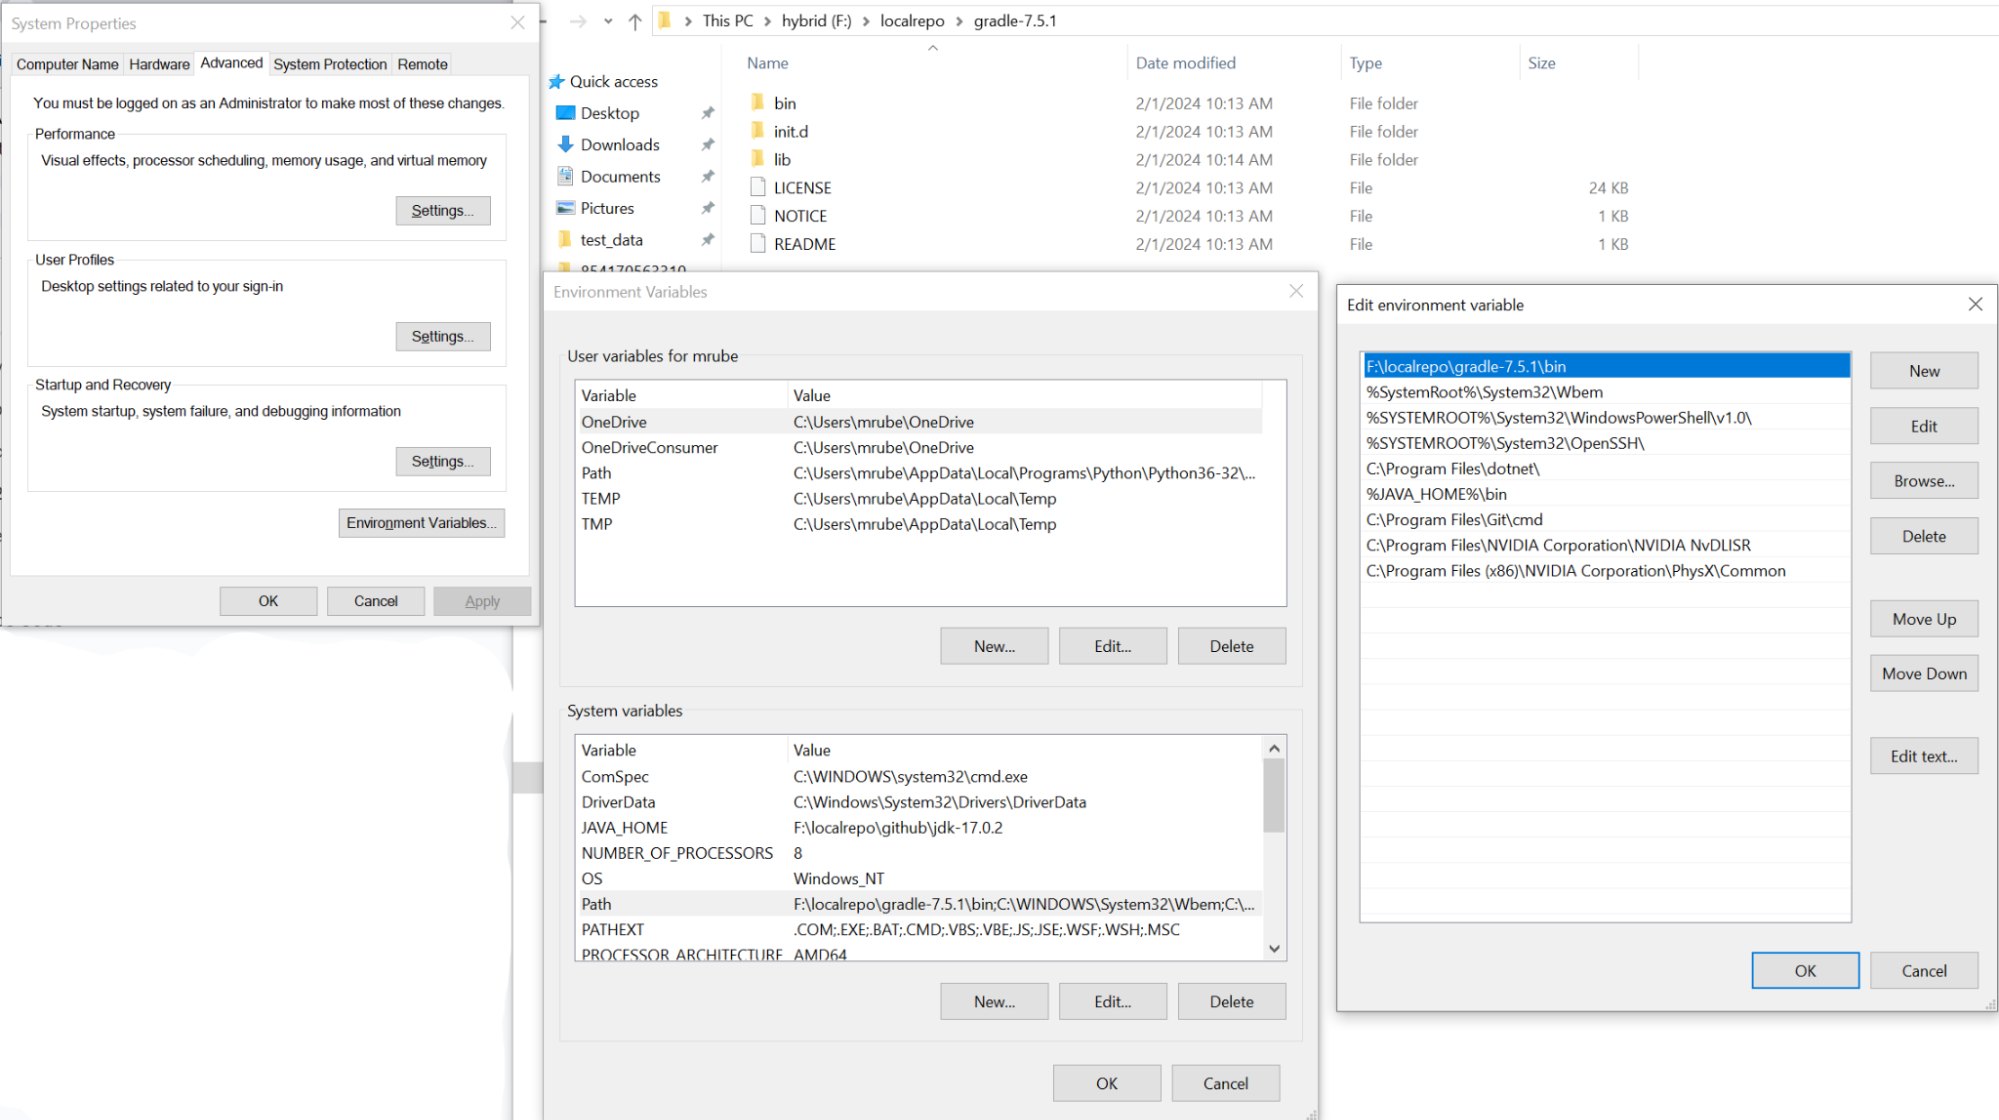
-
Open Command Prompt and type
gradle -versionto confirm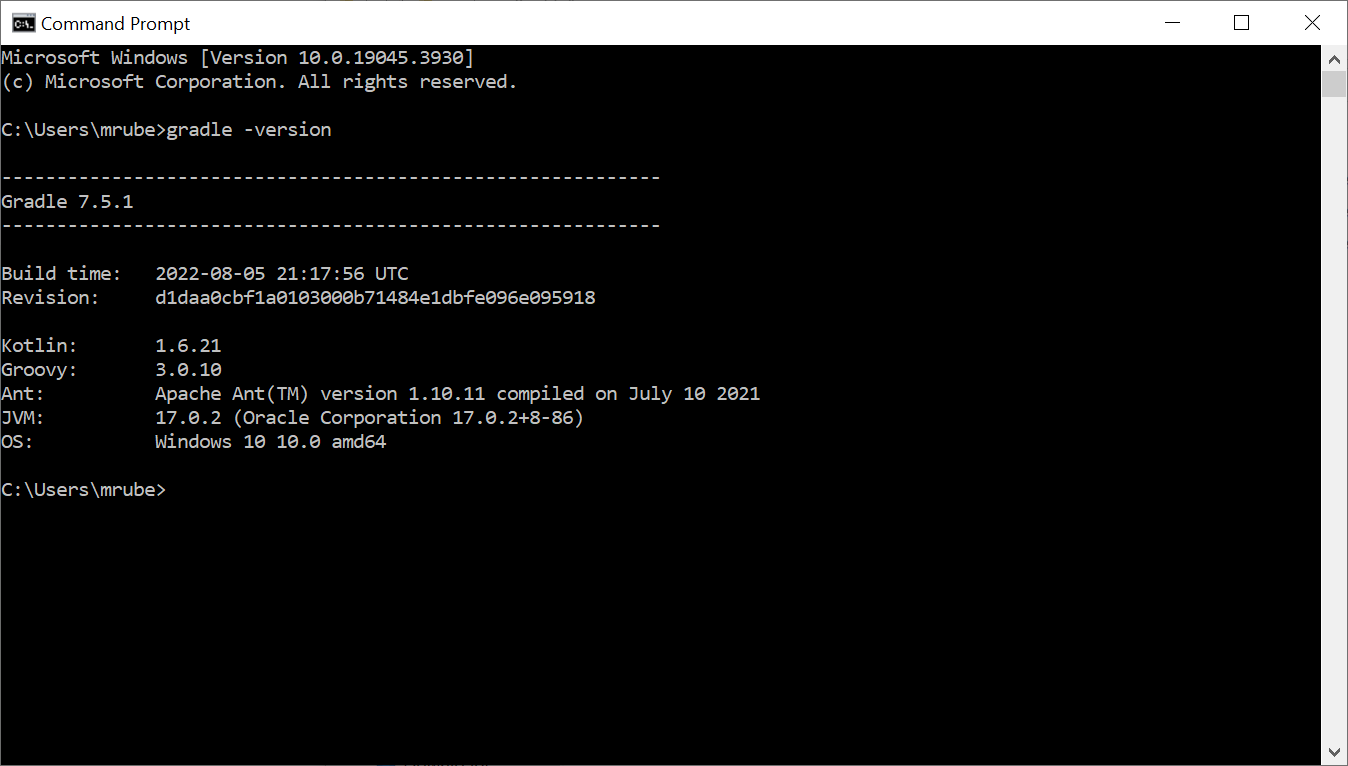
-
Type
gradle -stopin Command Prompt.
Third Party Dependencies
The final step before building requires you to have the third party dependencies that RCTab relies on.
-
Download the .zip of all necessary dependencies. The zip of all necessary dependencies for the v1.3.2 California release is called
v1.3.2_84df706_Windows_X64.cache.zipand can be downloaded from the release page under ‘Assets’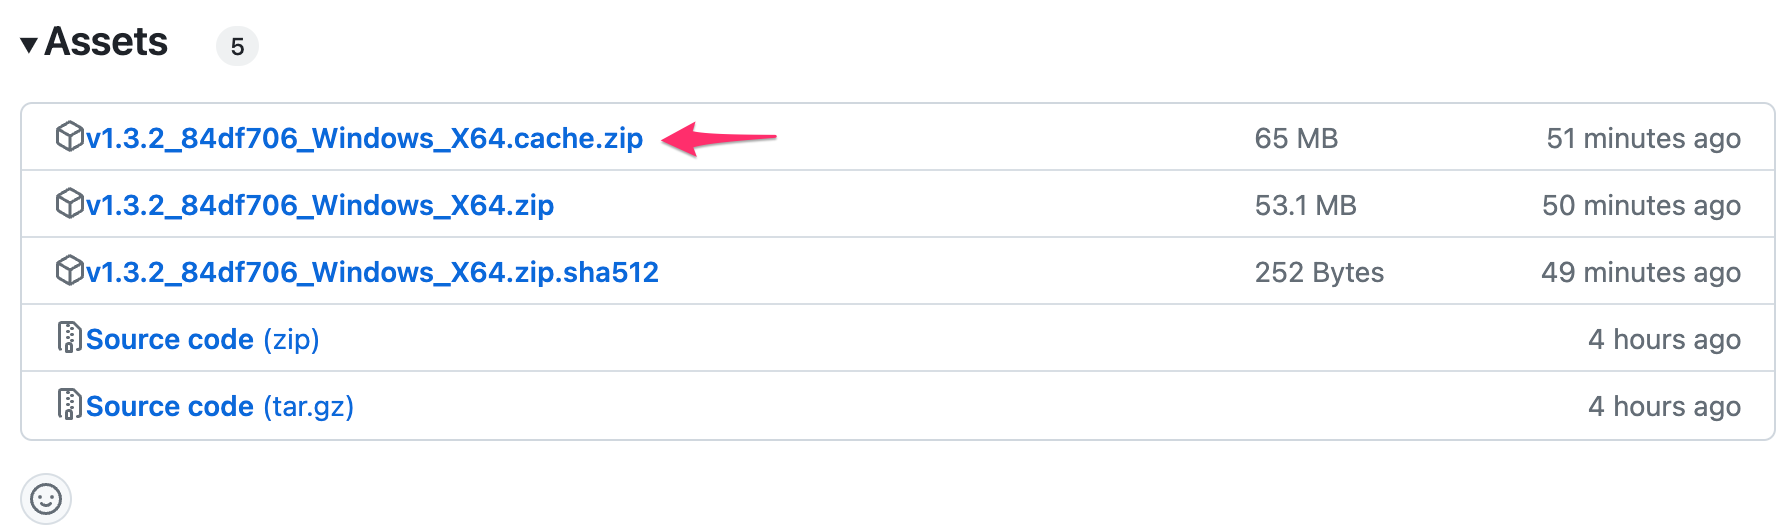
-
Extracting the .zip should create a
modules-2folder. Move that folder to~\.gradle\caches\If that folder doesn’t exist you should create it.~\in this step represents the logged-in Windows User folder. For example, if my Windows Username isRCTabUserthen at the end of this step I would haveC:\users\RCTabUser\.gradle\caches\modules-2- You can check which folder to substitute
~\for by typingecho %userprofile%into Command Prompt
- You can check which folder to substitute
-
If required, use jurisdiction rules to verify dependencies with
~\.gradle\caches\checksums.csv. This file contains a line for each necessary dependency that has- Filename
- SHA-1 Checksum
- SHA-256 Checksum
- Maven Dependency URL
- Direct URL to SHA-1
- Direct URL to SHA-256
Building From Source
Next, navigate into the source code directory in Command Prompt. We will run a command that will build the RCTab source code along with all of the third party dependencies (which are listed in Section 02 - Software Design and Specifications ). This command will build RCTab from source using Java 17.0.2 and Gradle 7.5.1
In Command Prompt, type the Gradle build command for Windows:
gradle jlinkZip
The output of the Gradle build command is a single ZIP file called rcv.zip that will be located in the .\build\ subdirectory. To complete the build process, rename the ZIP file to reflect the platform and version of the application.
On Windows, building version 1.3.2, for example:
rename build\rcv.zip rctab_v1.3.2_windows.zip
To generate a hash signature for the completed build, run this command on Windows:
C:\Windows\System32\certutil.exe -hashfile build\rctab_v1.3.2_windows.zip sha512
Example output on Windows:
SHA512 hash of build\rctab_v1.3.2_windows.zip:
f1b05aa5cdff8c01ee220579d5b5310911a75d0e58bc5568113b893845a31c47abab8a0875bda78f29a89e8218d22af00ea770c83ff39eb5b68b41ddfb8254ee
CertUtil: -hashfile command completed successfully.
Note, however, that two independent runs of the jlinkZip task will result in ZIP files with different hashes! Although the file contents in the two ZIP files will be identical, the timestamps of those files will not be. Those timestamps are included in the hash and thus, the hashes will not match. As a result, generating a hash for the ZIP file itself is only suitable for verifying that this build has not been modified.
To confirm that the file contents of one build match those of another, for example that the local build matches the official release on the BrightSpots github, see ‘Comparing Two Builds’ below.
Comparing two builds
As noted above, two independent builds of the same source code will have different hashes due to the presence of file timestamps within the ZIP file. It is, however, possible to demonstrate that two builds are equivalent by stripping the timestamps.
The process for generating a single timestamp-independent hash signature for a build ZIP requires a few steps: not only does the ZIP file store timestamps for the files it contains, but one of the files within the ZIP file, lib/modules, is, in turn, a collection of time stamped files. Fully decomposing the build to its individual constituent files thus requires using the jimage utility (part of the Java 17 development kit) to extract the files contained within lib/modules.
- First, unzip the ZIP you built locally (by following the precise instructions in the “Full build” section above). For the rest of this example we’ll assume that you extracted the zip files to
c:\rctab_v1.3.2_windows\ - Make sure not to execute any other commands that create, modify, or delete files within this directory (like opening the application). Any modifications to these files will change the result of the hashing process.
- Create a
hash.batfile in thec:\rctab_v1.3.2_windows\folder with the following commandecho.>hash.bat - Open hash.bat in notepad and paste in the text below these bullets (starting with ::hash.bat)
- Run the batch file in the cmd prompt by typing
hash.batthen enter. It can take 30-45 minutes to complete as it is computing a hash for every single file
:: hash.bat
@echo off

:: NOTE: This script must be placed one level up from the rcv directory

echo Initiating batch hash procedure
set startTime=%date% %time%
echo %startTime%

setlocal EnableExtensions EnableDelayedExpansion

set "HASHFILE=all_hashes.txt"
set "TEMPHASHFILE=all_hashes_temp.txt"
set "EXTRACTIONDIR=.\rcv\modules_extracted"
set "MODULESFILE=.\rcv\lib\modules"

if exist %HASHFILE% (
    echo Deleting existing hash file, %HASHFILE% ...
    del %HASHFILE%
)

if exist %EXTRACTIONDIR% (
    echo Deleting existing extracted modules directory, %EXTRACTIONDIR% ...
    rmdir /s /q %EXTRACTIONDIR%
)

echo Extracting contents of modules file...
mkdir %EXTRACTIONDIR%
cd %EXTRACTIONDIR%
jimage extract ..\..\%MODULESFILE%

echo Temporarily relocating modules file...
cd ..\..
copy %MODULESFILE% .
del %MODULESFILE%

:: Calculate the hash for every file here and in all subdirectories, appending to the file (format "(filename) = (hash)")
echo Calculating hashes...
for /r .\rcv %%f in (*) do (
    <NUL set /p ="%%f = " >> %HASHFILE%
    C:\Windows\System32\certutil.exe -hashfile "%%f" SHA512 | findstr /v ":" >> %HASHFILE%
    echo hashing %%f
)

echo Restoring modules file...
move .\modules %MODULESFILE%

:: Replace the absolute paths to each file with relative paths (e.g. C:\temp\rcv => .\rcv)

echo Replacing absolute paths with relative paths in hash file...
set "SEARCHTEXT=%cd%"
set "REPLACETEXT=."
for /f "delims=" %%A in ('type "%HASHFILE%"') do (
    set "string=%%A"
    set "modified=!string:%SEARCHTEXT%=%REPLACETEXT%!"
    echo !modified!>>"%TEMPHASHFILE%"
)
del "%HASHFILE%"
rename "%TEMPHASHFILE%" "%HASHFILE%"

echo Sorting the hash file...
sort "%HASHFILE%" > "%TEMPHASHFILE%"
del "%HASHFILE%"
rename "%TEMPHASHFILE%" "%HASHFILE%"

echo Calculating the hash of the entire sorted hash file...
C:\Windows\System32\certutil.exe -hashfile %HASHFILE% SHA512

endlocal
Example output (Windows):
SHA512 hash of all_hashes.txt:
dfc48c8e8606316144ebbcb2e7c5dacfdc709834460b443a5a88a9e09ea7273b59c1a4d3605fea3654e57aa11143461b2c8f035bd380af388ecc0fb513b98c7e
CertUtil: -hashfile command completed successfully.